You can transfer ERC-20 tokens with the Ethereum Network to your Trezor. All ERC-20 tokens are supported by Trezor, although they may not be listed in the Supported coins & tokens list for Trezor yet. Shiba Inu (SHIBA) is an example but SHIBA isn’t a token you can select directly in Trezor Suite, so we must add it manually before transferring tokens to to the account.
Create a token i Trezor Suite
The procedure for creating a token wallet in Trezor Suite is quite simple (explanatory images below):
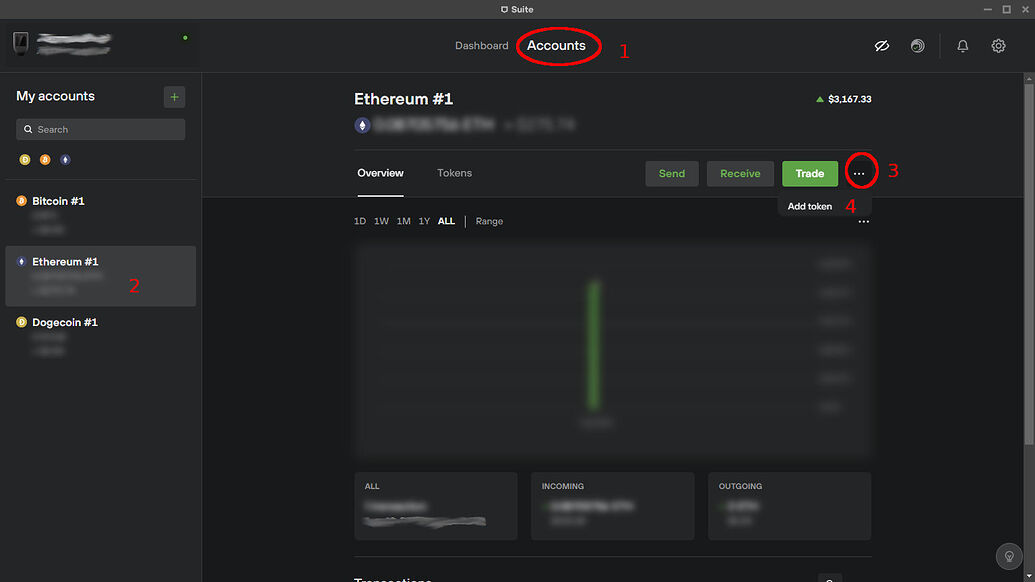
- In Trezor Suite, select Accounts on the top.
- Select an Ethereum account.
- Click on the 3 dots … to the right of the Trade button.
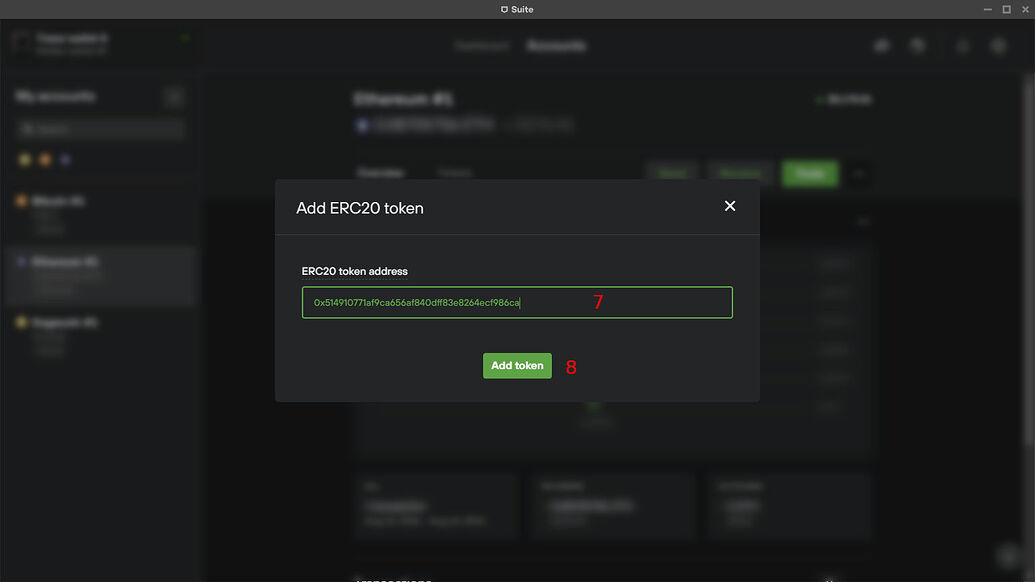
- Click Add token. It will ask you for a contract address, so
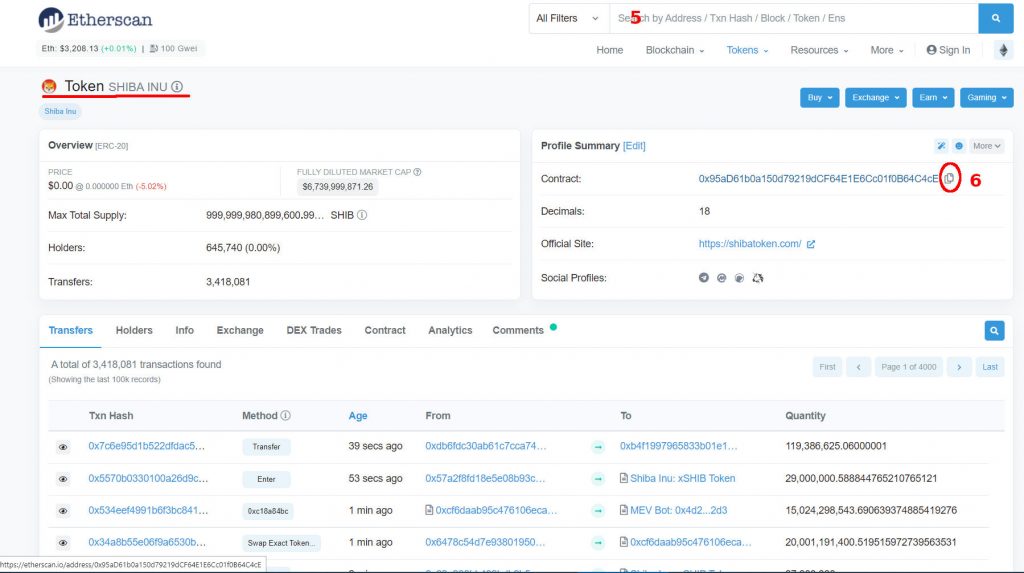
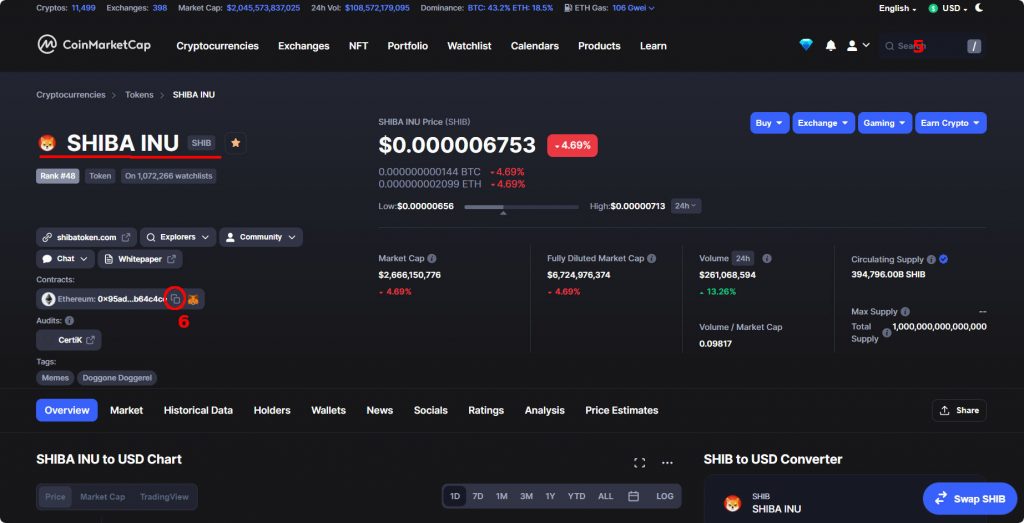
- Go to Etherscan, CoinMarketCap, or other site where you can search for the token and find the contract address. Please make sure you’ve found the right token.
- Copy the address by pressing the copy symbol to the right of the address.
- Go back to Trezor Suite and paste in the address.
- Click Add token button.
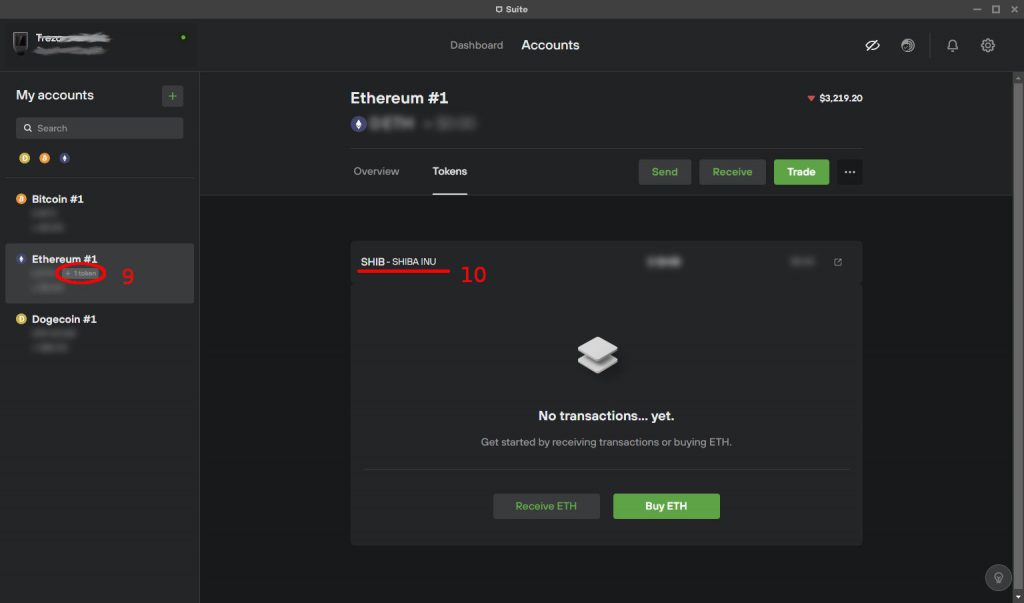
- Click on the Token tag beside your Ethereum account.
- You’ll see your token is added!
Note that if you don’t use the newly created token before you exit Trezor Suite then it’ll be removed and you’d have to add it again later if you still want it.
Send your ERC-20 tokens to Trezor
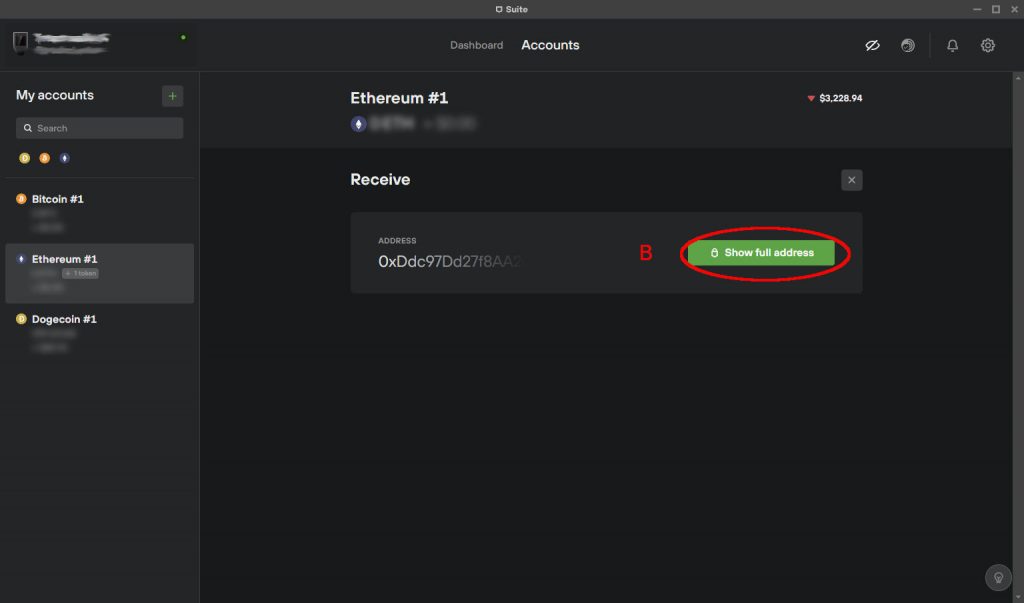
- Create an ETH Receive address for an Ethereum transfer. (A)
- In the next image, you’ll see the Receive address Trezor has created for you. Press Show full address. (B)
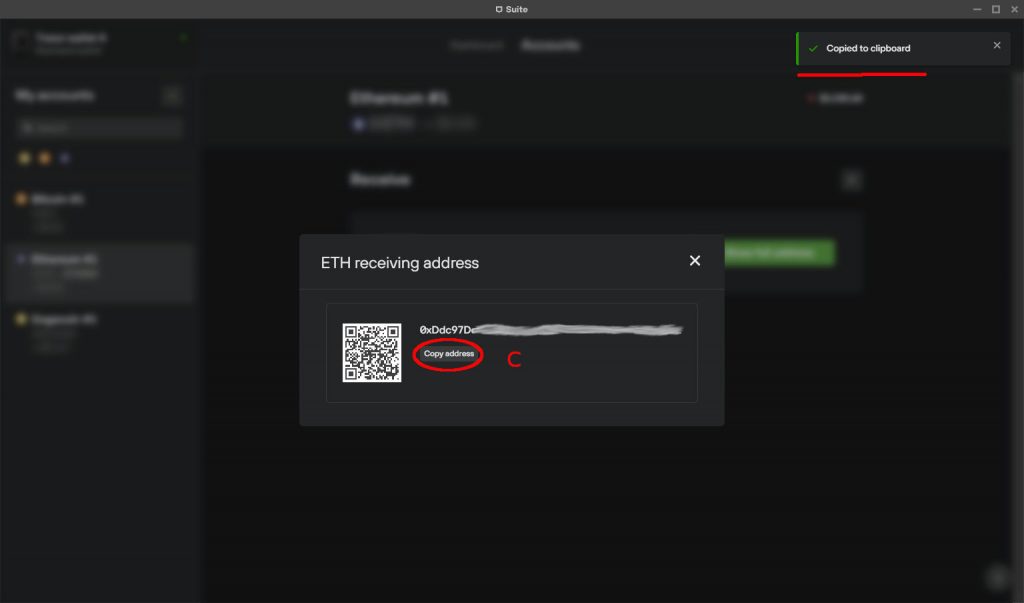
- Copy this Receive address to clipboard. (C)
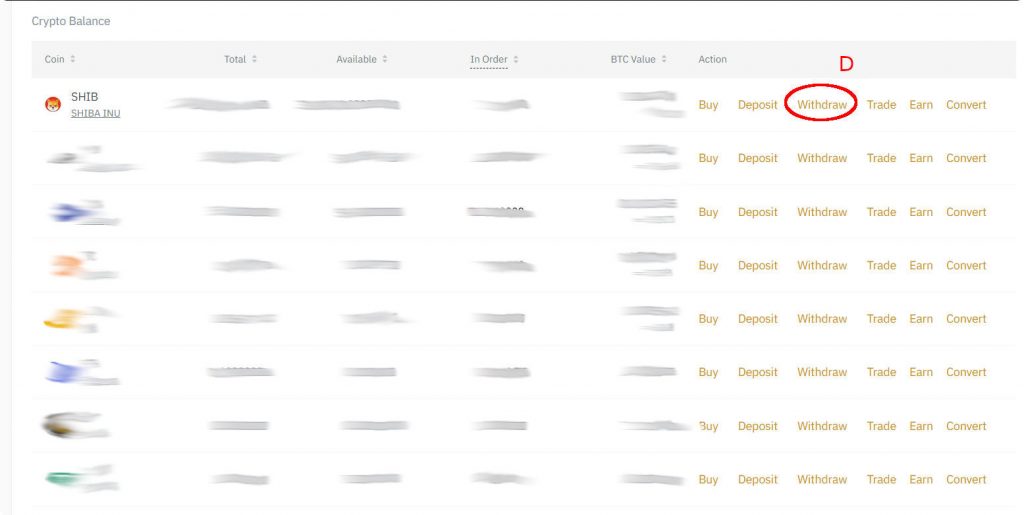
- Go to the account where you have stored your tokens now. I’ll use Binance as example here.
- Press Withdraw (or Send) where you have SHIBA. (D)
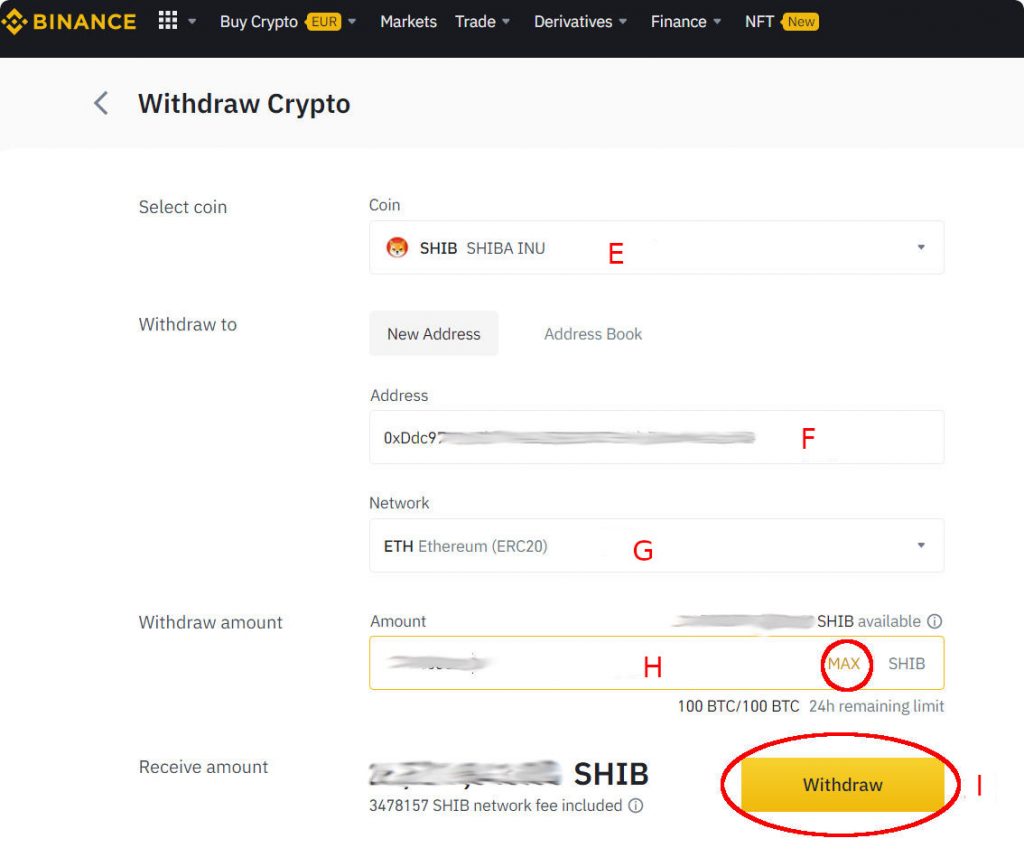
- Make sure you’ve selected the right coin to send. (E)
- Paste the address you copied into clipboard in pt. 13 into the Withdraw/Send to address. (F)
- Binance won’t ask, but if prompted about contract address, use SHIBA’s contract address (0x95aD61b0a150d79219dCF64E1E6Cc01f0B64C4cE).
- Select the Ethereum network for the transfer. Important! (G)
- Set the amount of SHIB you want to send to Trezor. If you press MAX then all SHIB you have in the Binance account (minus fee) will be sent. (H)
- Check and double check that everything you’ve entered are correct and that you agree with the fee.
- Press the Withdraw (or send) button. (I)

NOTE: Make sure you check and double check that you’re doing this correctly from where you send SHIBA tokens – before you press Withdraw/Send!
NOTE: Don’t use any other network than Ethereum, even if other networks may be cheaper!
See a searchable list of Supported coins & tokens for Trezor in the links below. If they’re marked with ERC20 after the name, then they’re supported by using the above method.
If you have any questions about this procedure, or are unsure about something, please don’t hesitate to ask in the Trezor forums (see link below) – before you do it.
Trezor and Trezor Suite are products made by SatoshiLabs s.r.o.
Links
Trezor Suite for desktop: https://suite.trezor.io/
Official list of supported coins & tokens for Trezor: https://trezor.io/coins/
Etherscan.io: https://etherscan.io/
CoinMarketcap.com: https://coinmarketcap.com/
Binance Exchange: https://www.binance.com/
Trezor shop: https://shop.trezor.io/?offer_id=10&aff_id=9025